As the title pretty much says I was wondering and also wanted to try and see if I can build my own Kubernetes cluster using some ARM boards that I had laying around for some time now.
Can they do something more useful rather than collecting dust? We shall see …
Main goals
- Build a cluster from spare parts – doh, that’s obvious …
- Learn more about this new kid on the block – Kubernetes
The setup
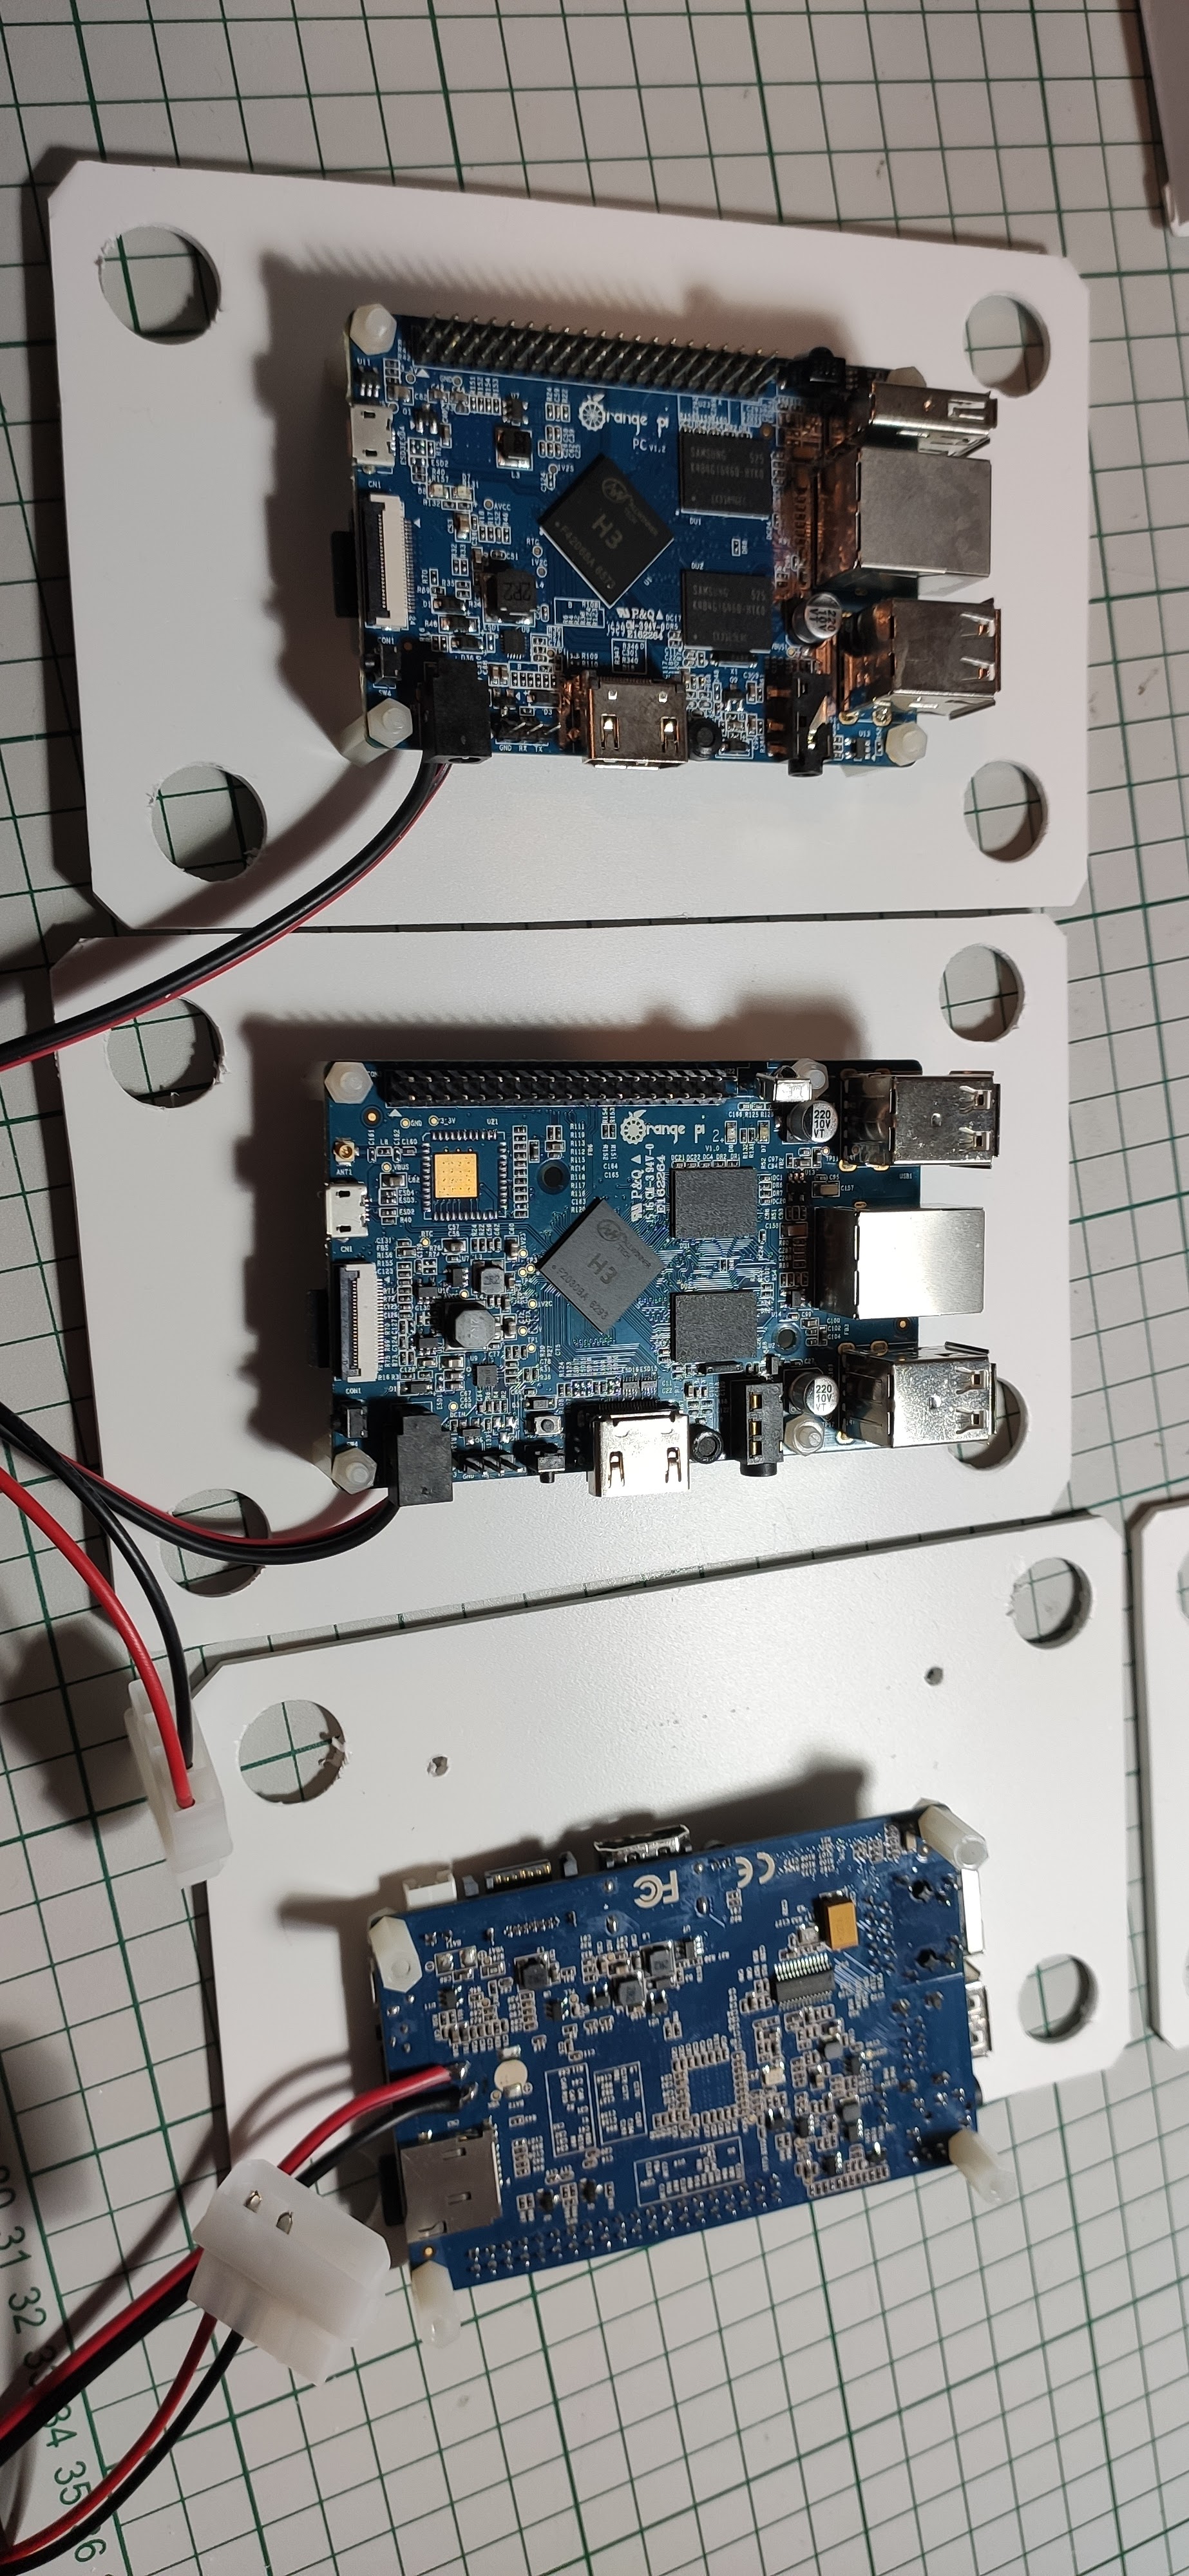
Some OrangePi boards bought from AliExpress long time ago. Funny the name though – they are actually clones (well, more or less) of the now ubiquitous Raspberry PI boards.
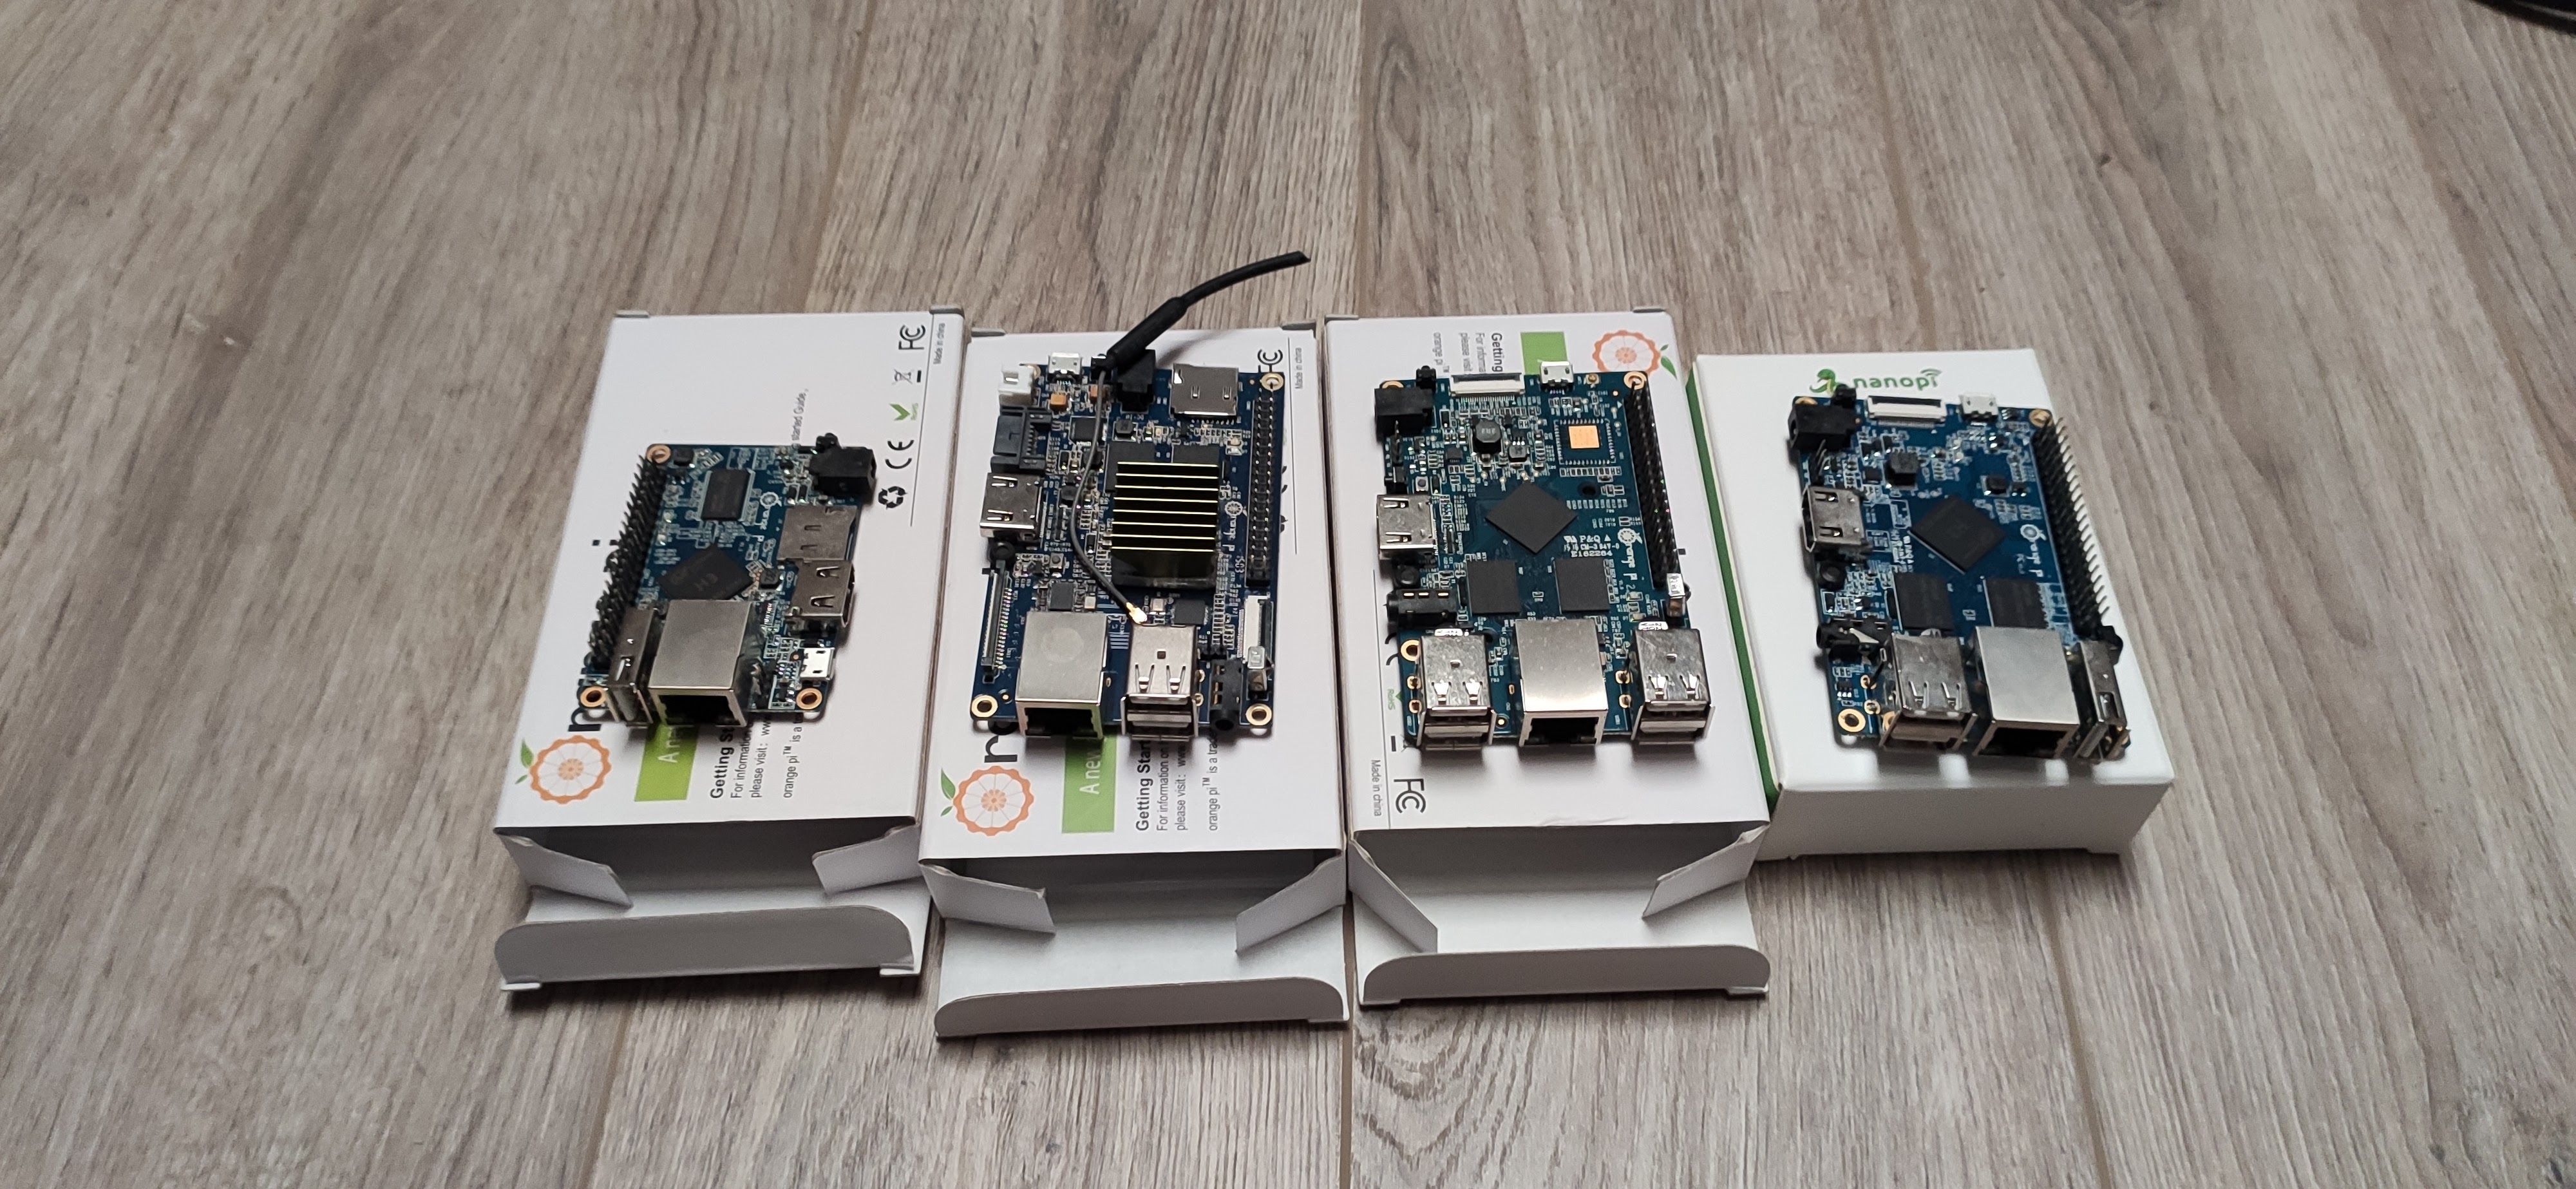
I only picked 3 of them for now and started building the rack (although there are 4 in the picture above). Of course we can expand the cluster if needed in the future but for now let’s start small and see how it behaves first shall we?
The building phase
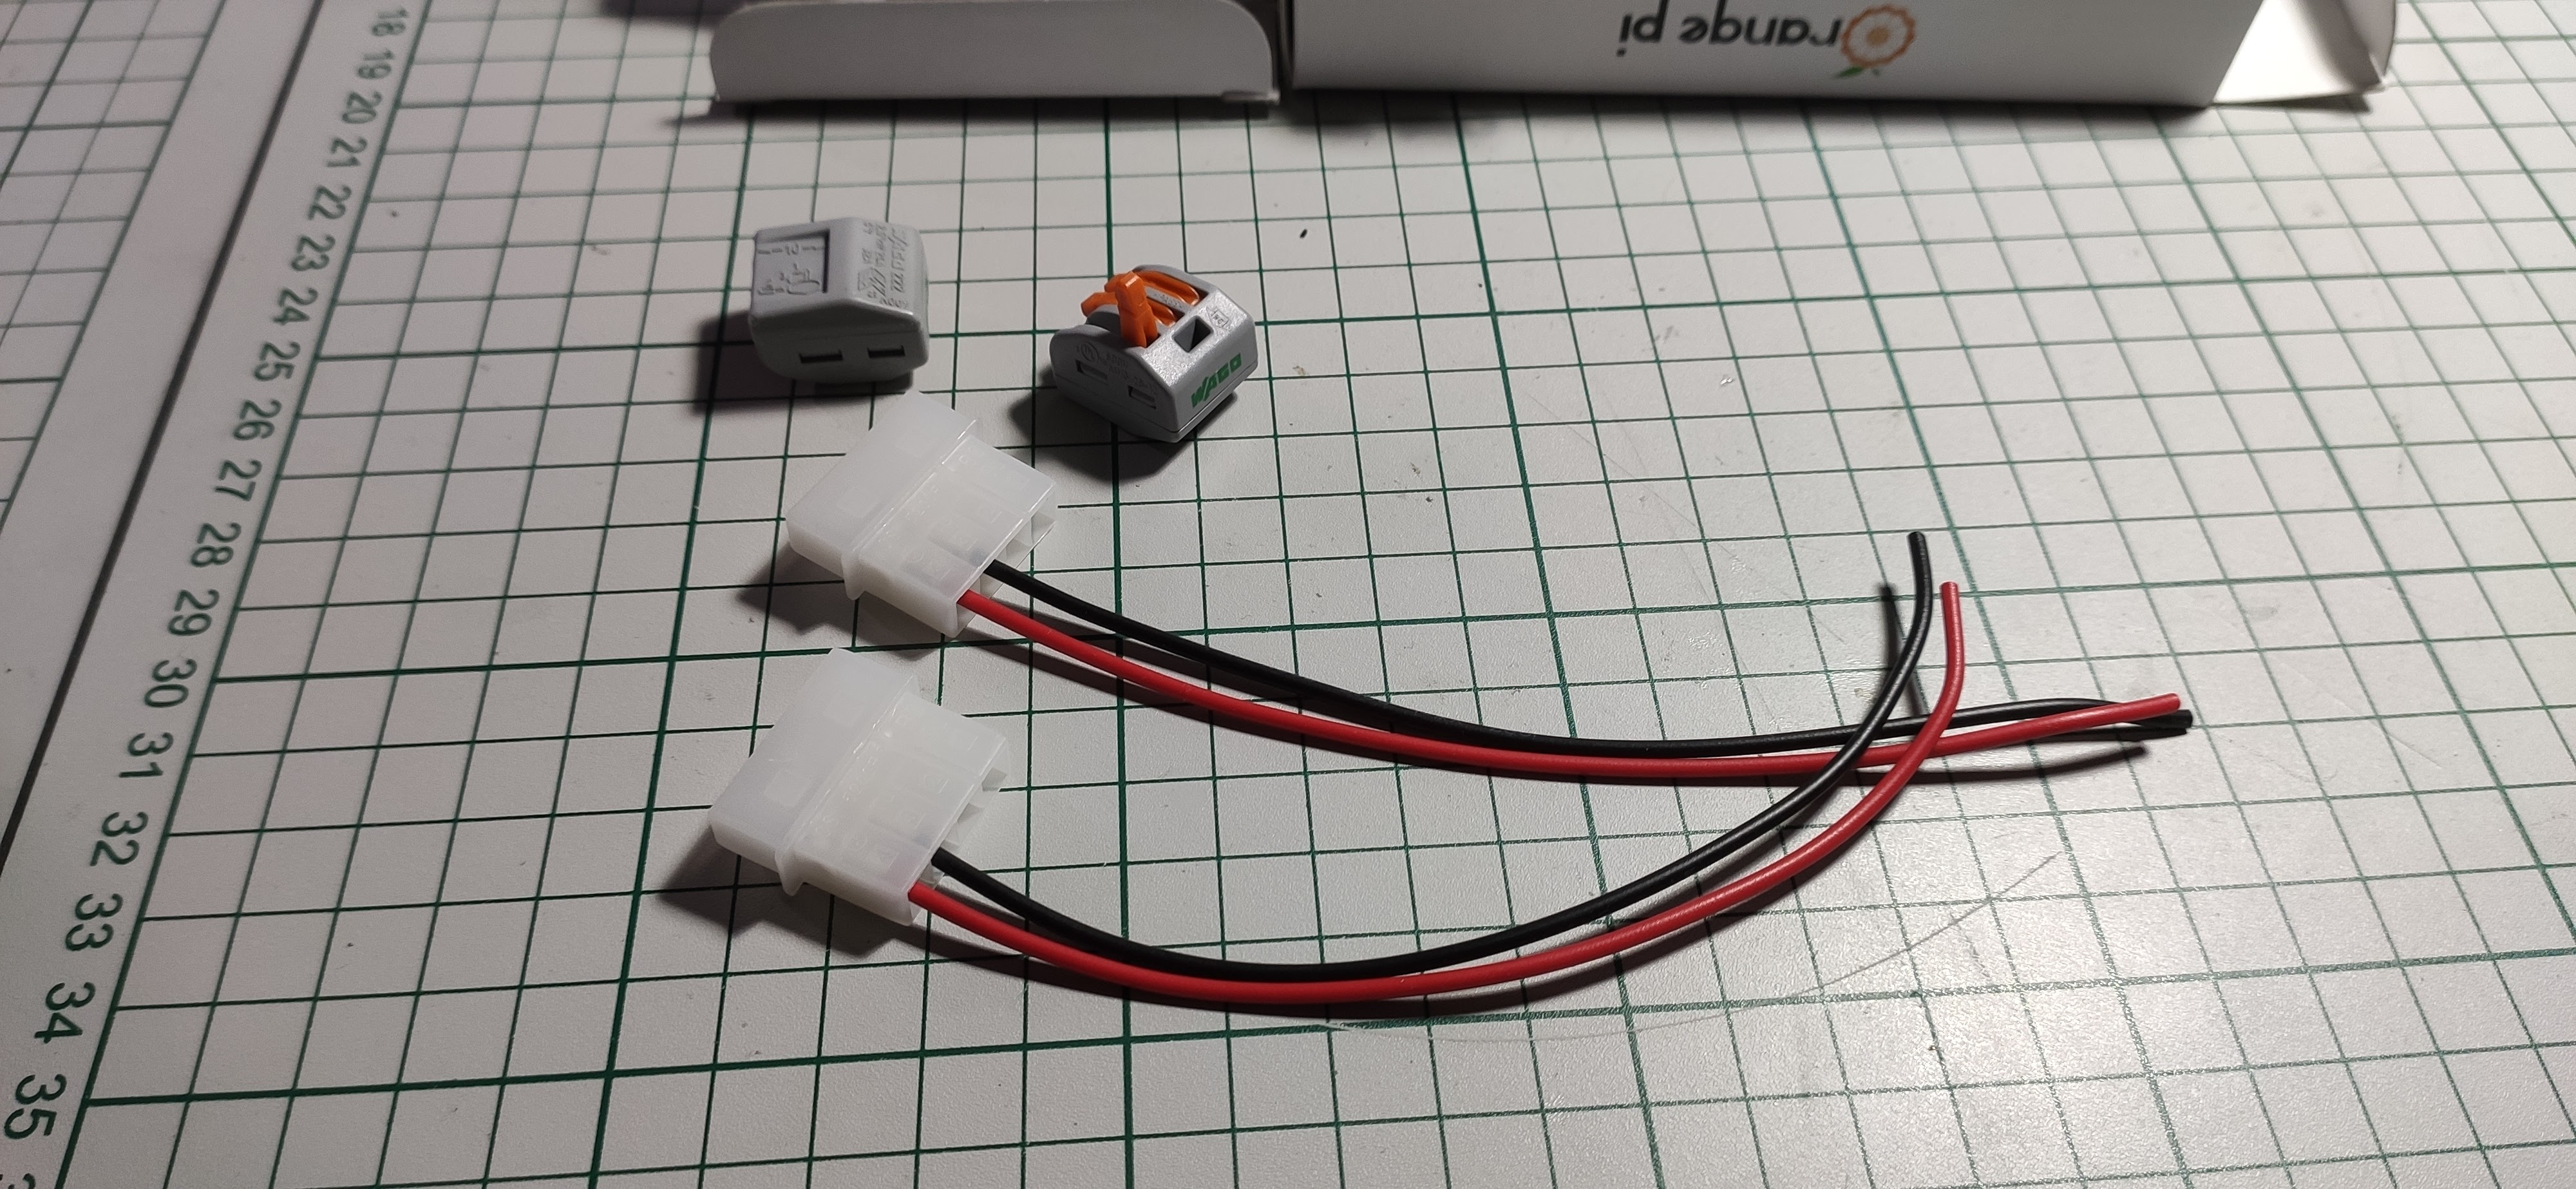
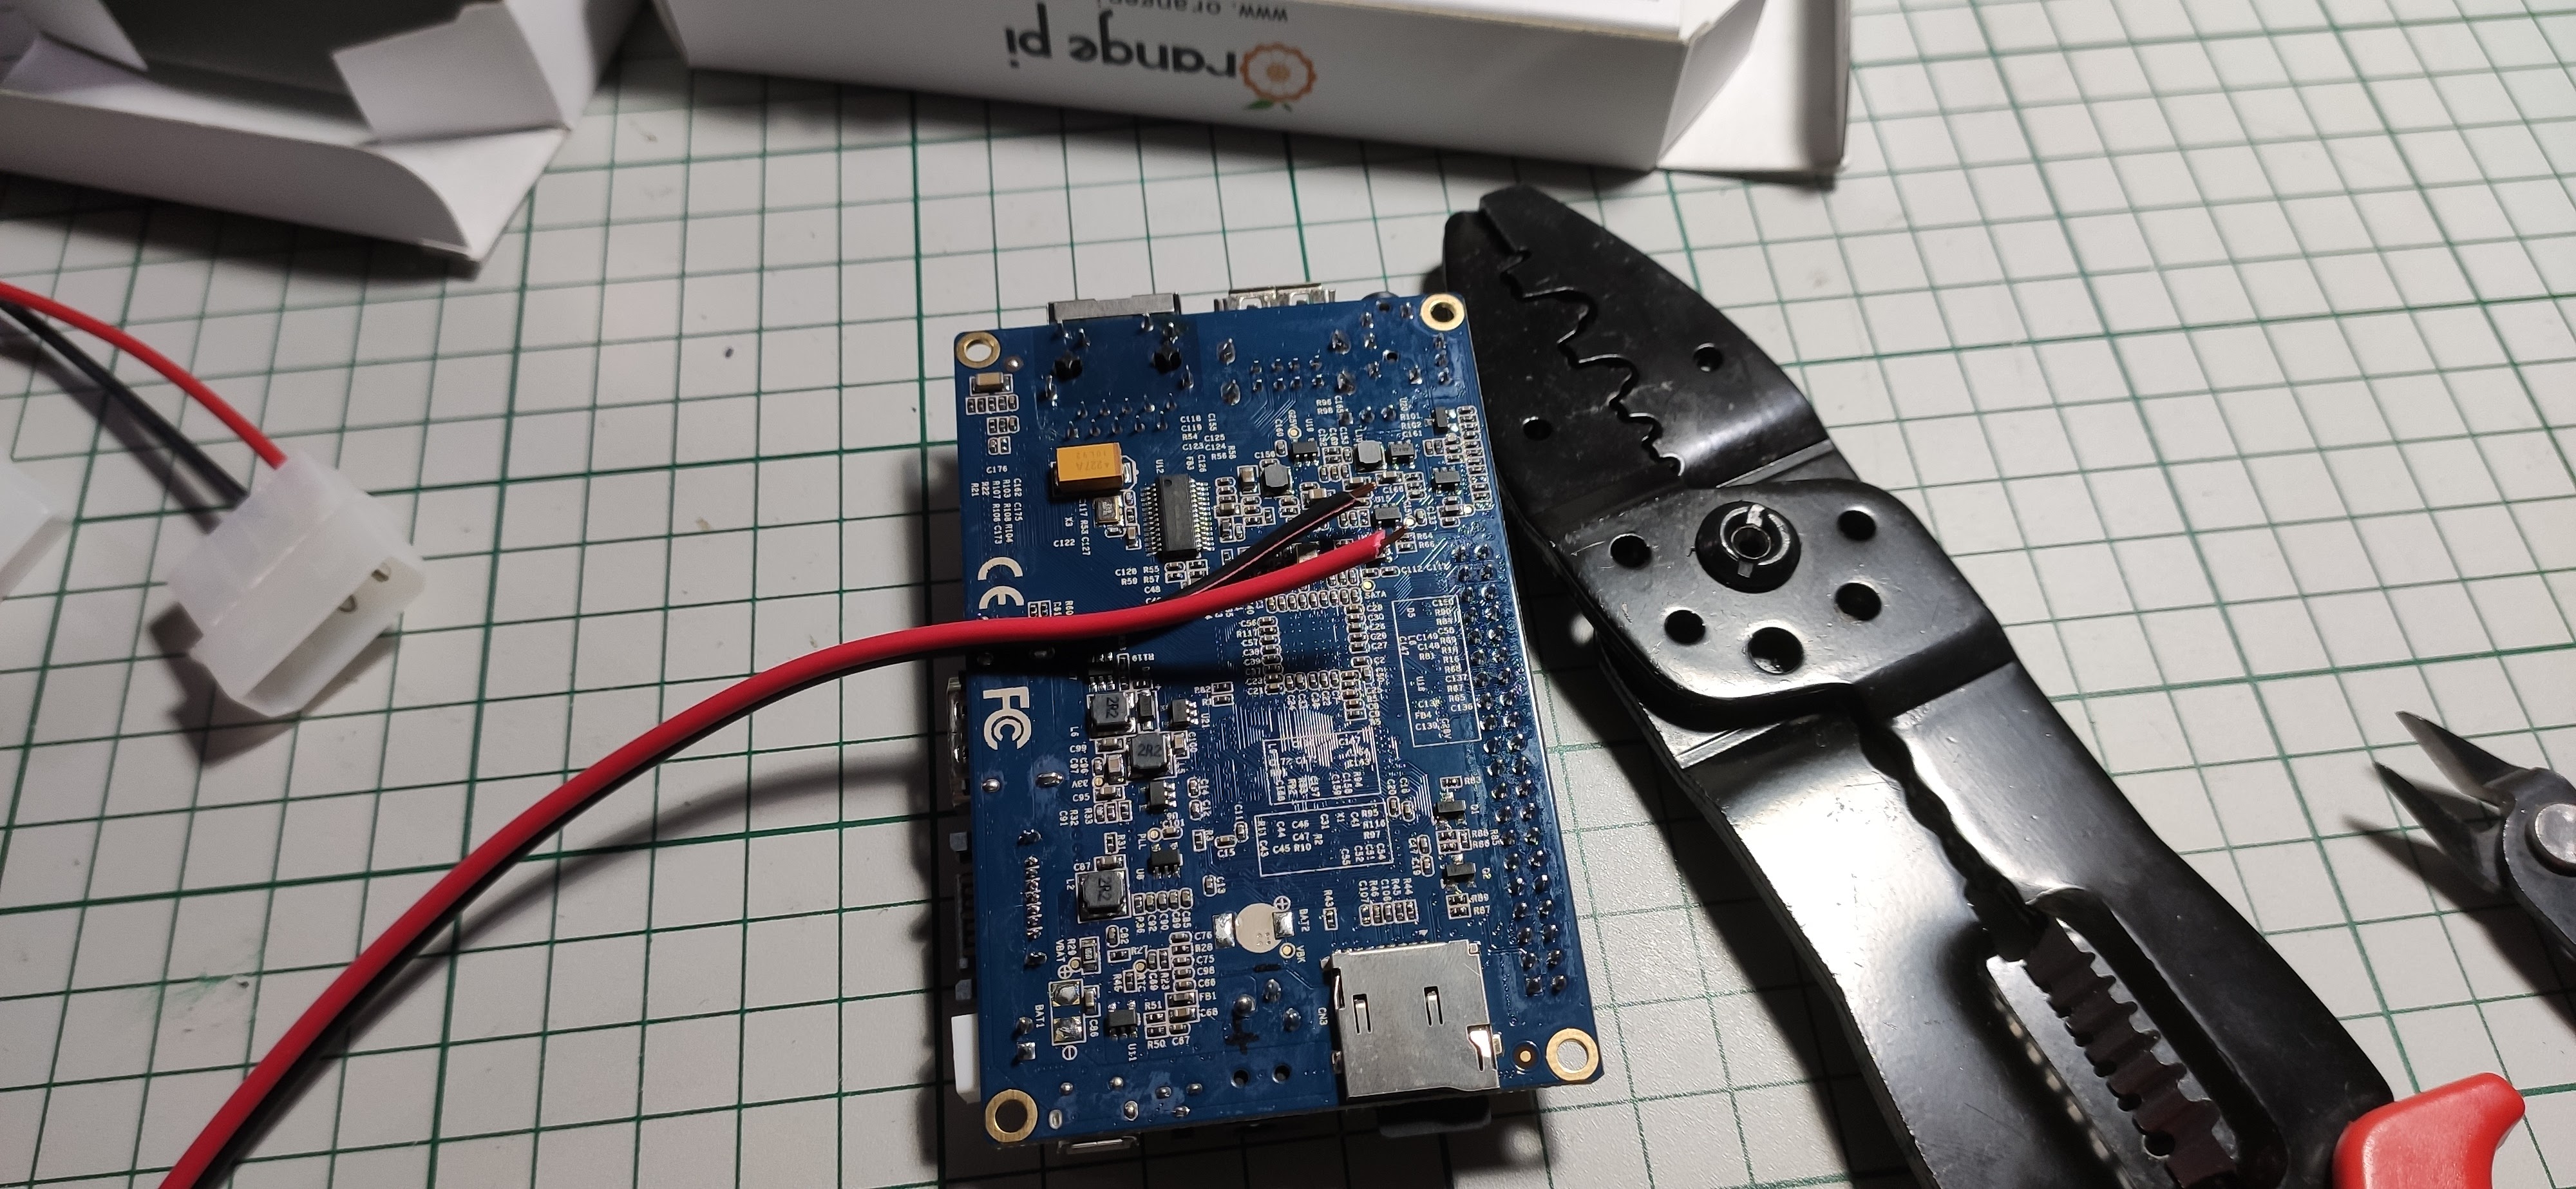
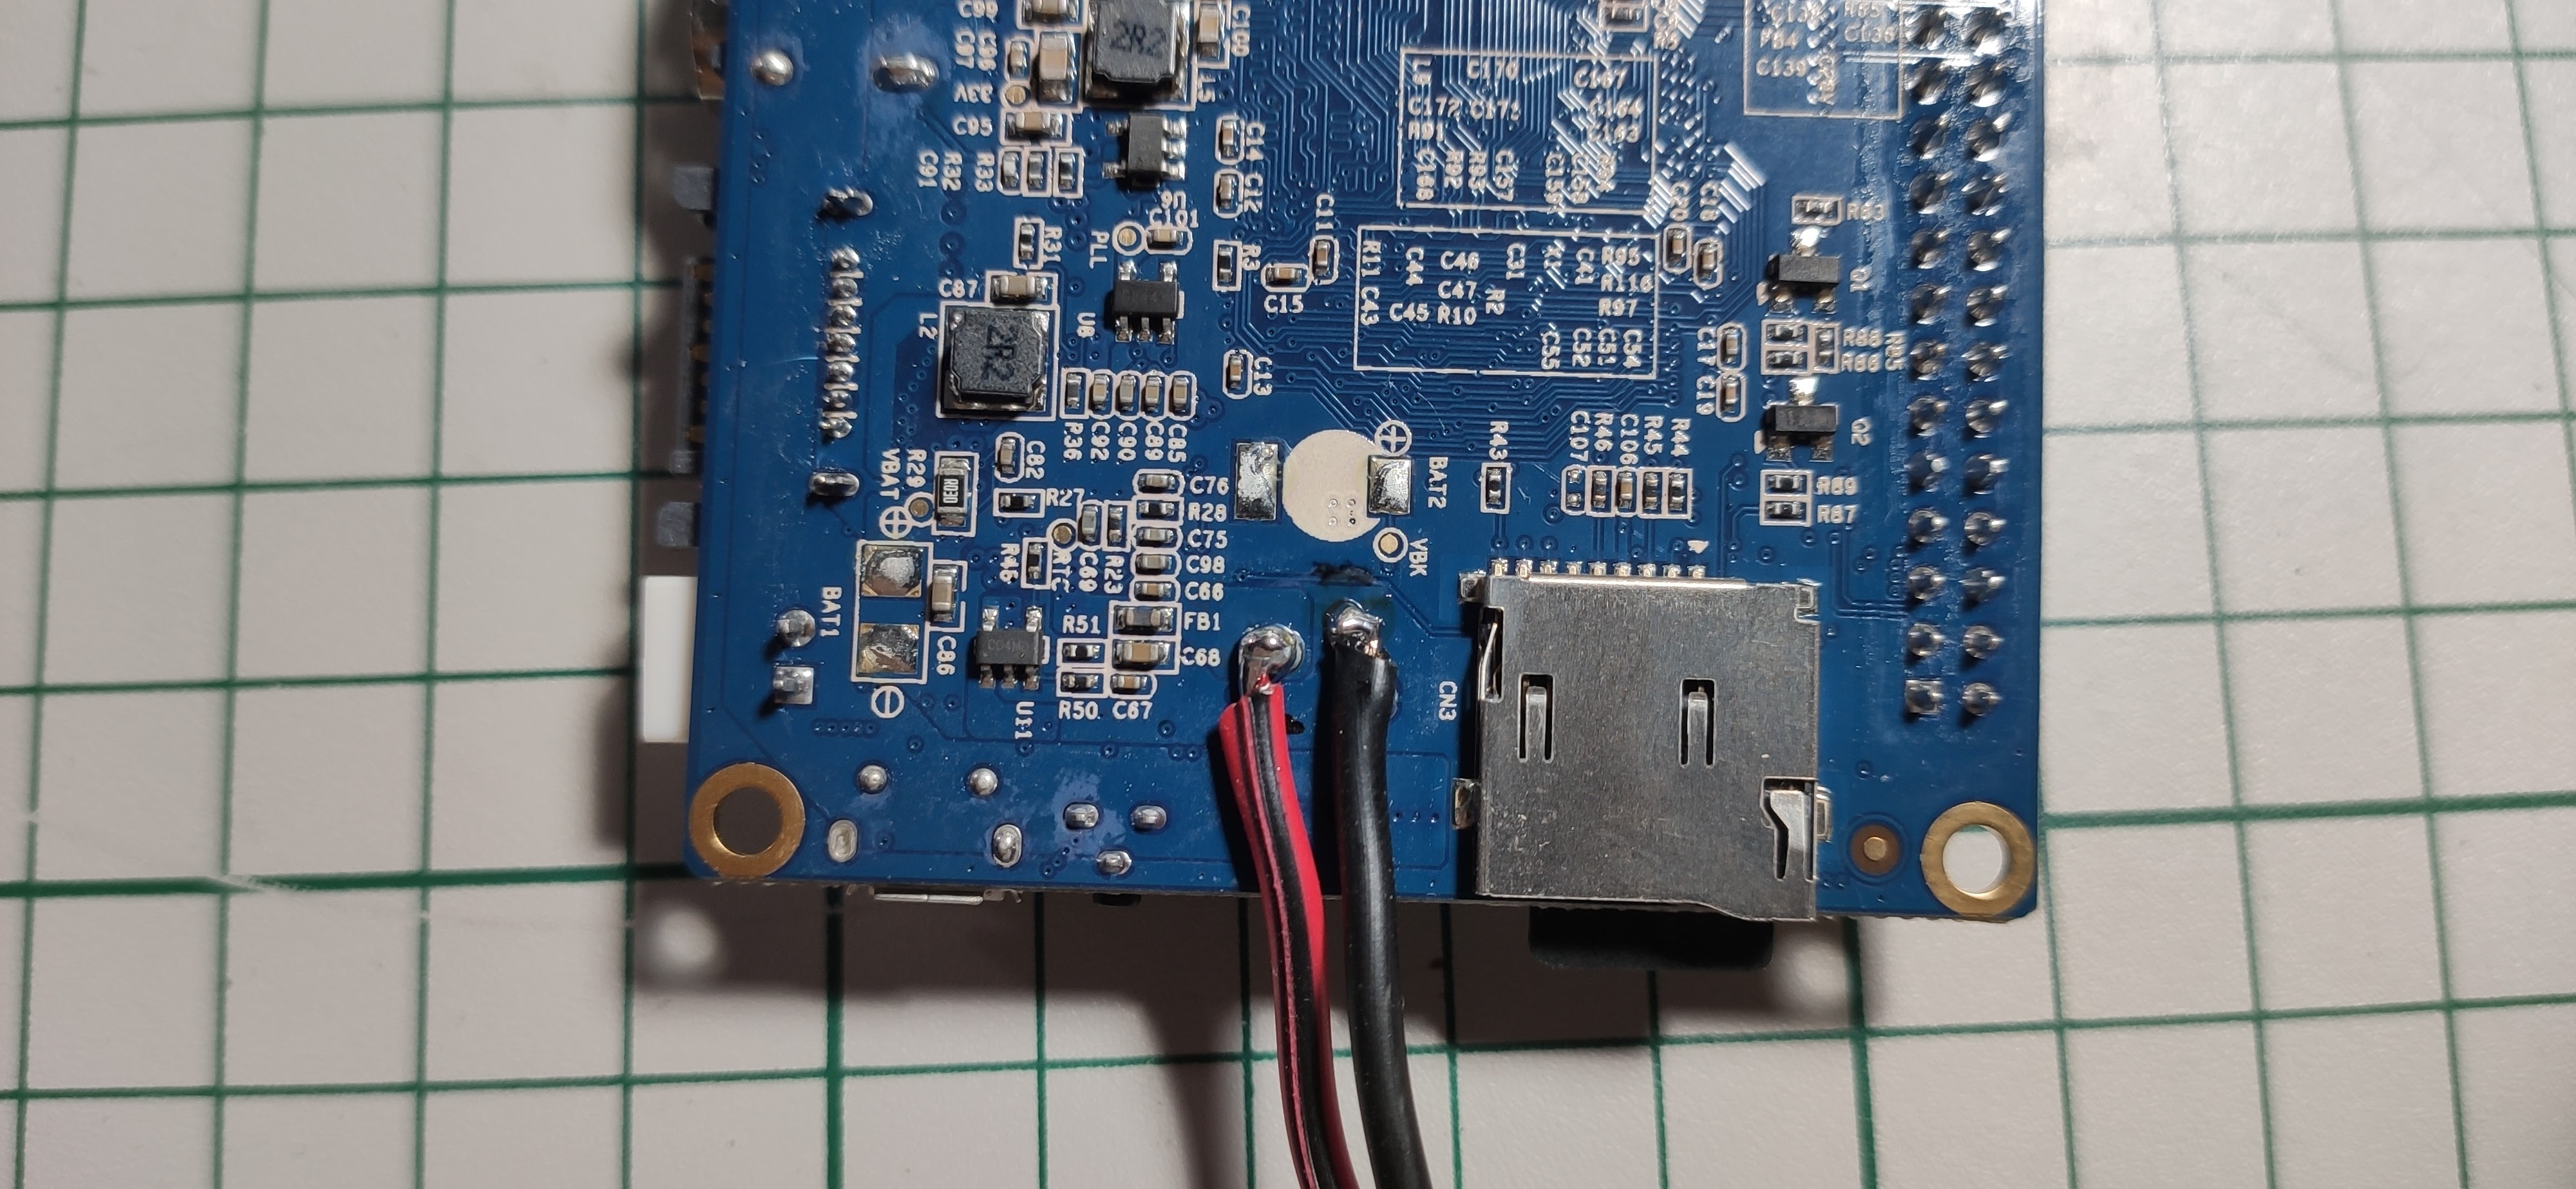
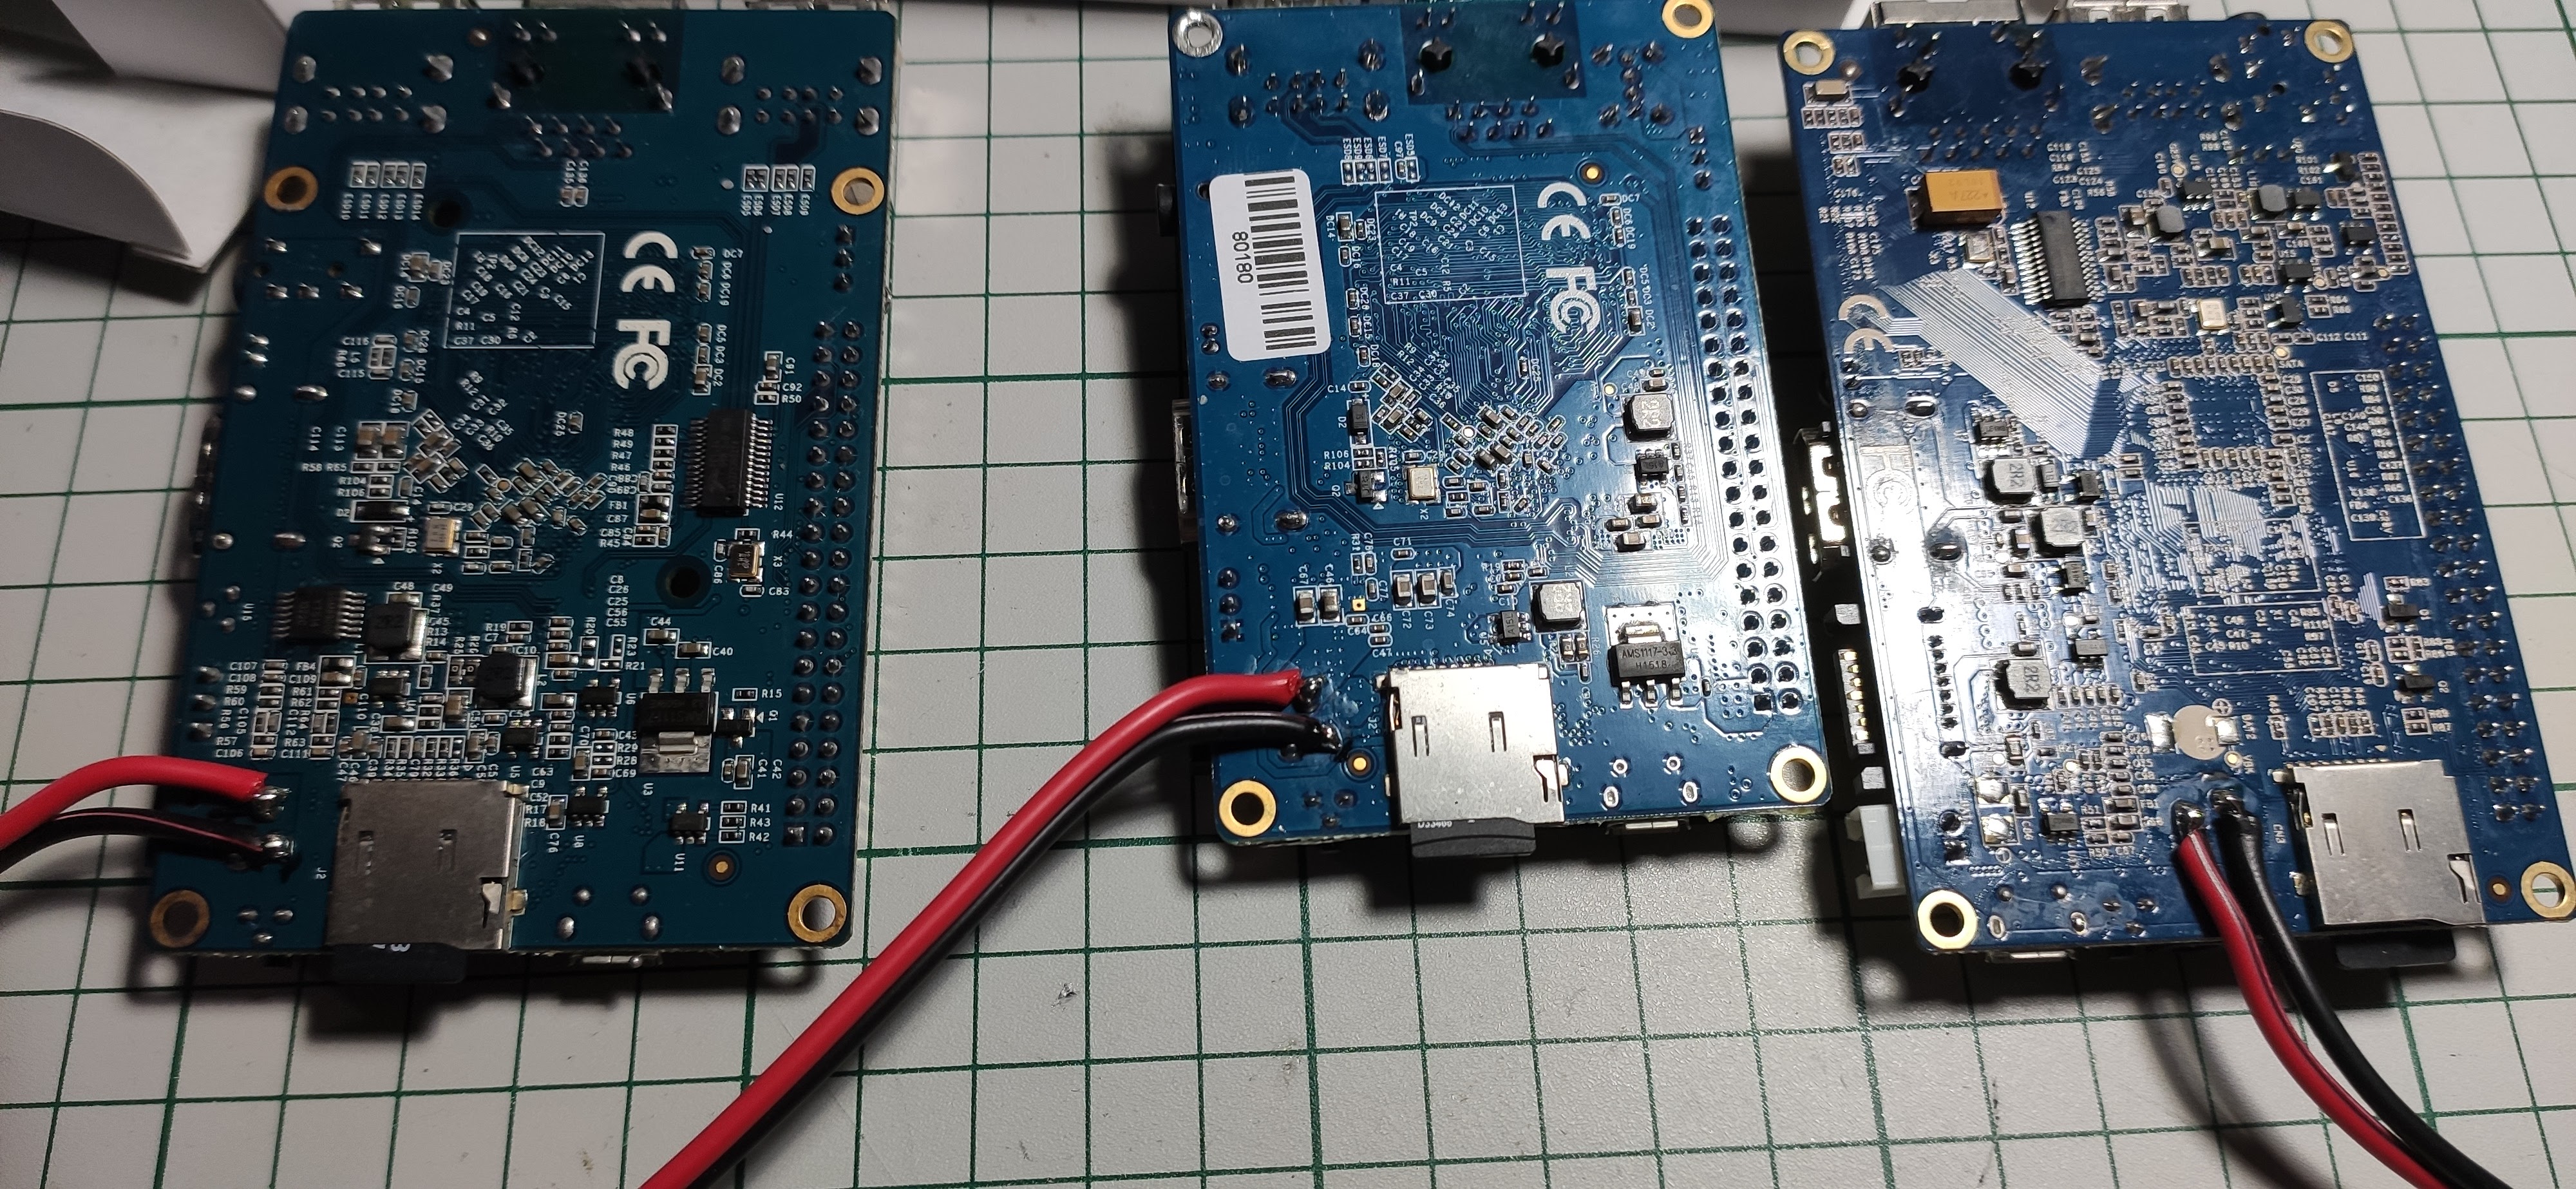
First, some soldering for the “power plane“. Each board requires a barrel connector for powering with 5V/2A but I had only one around so I decided to solder some wires on the back side because yeah, I was lazy and didn’t want to go to the hardware store. And please bear with me as everything went just fine and nobody or nothing suffered injuries – here I mean the boards themselves. It’s not the first time when doing soldering and the soldering iron is my best friend of course …
OK, some pictures now:

Next I sliced and prepared some sheets of plastic:
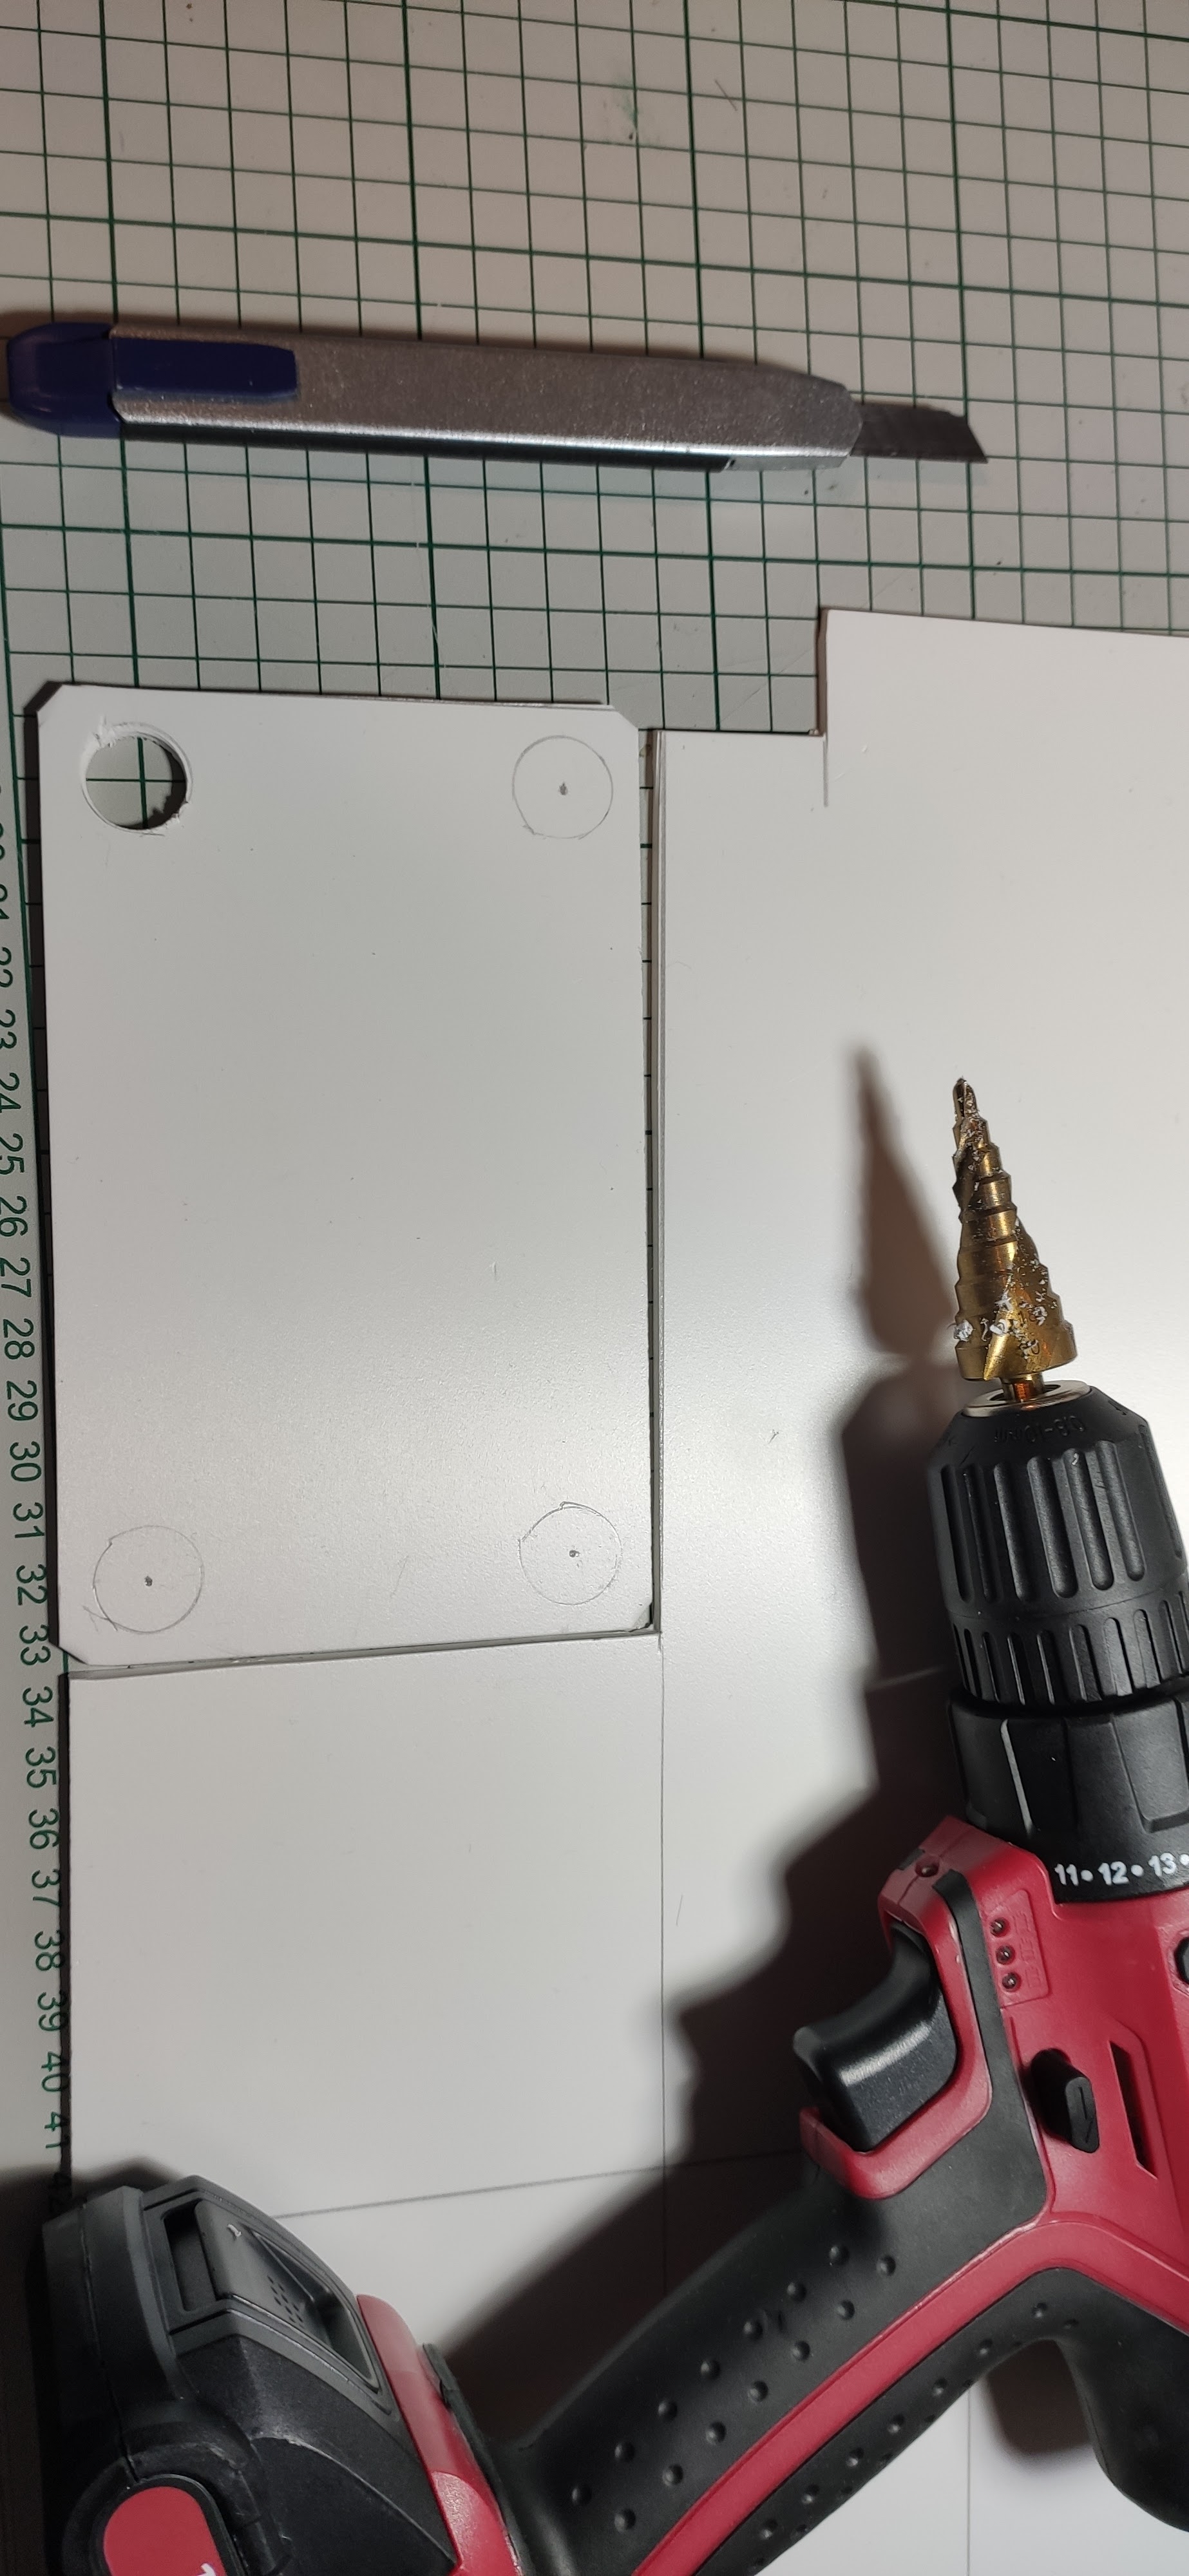
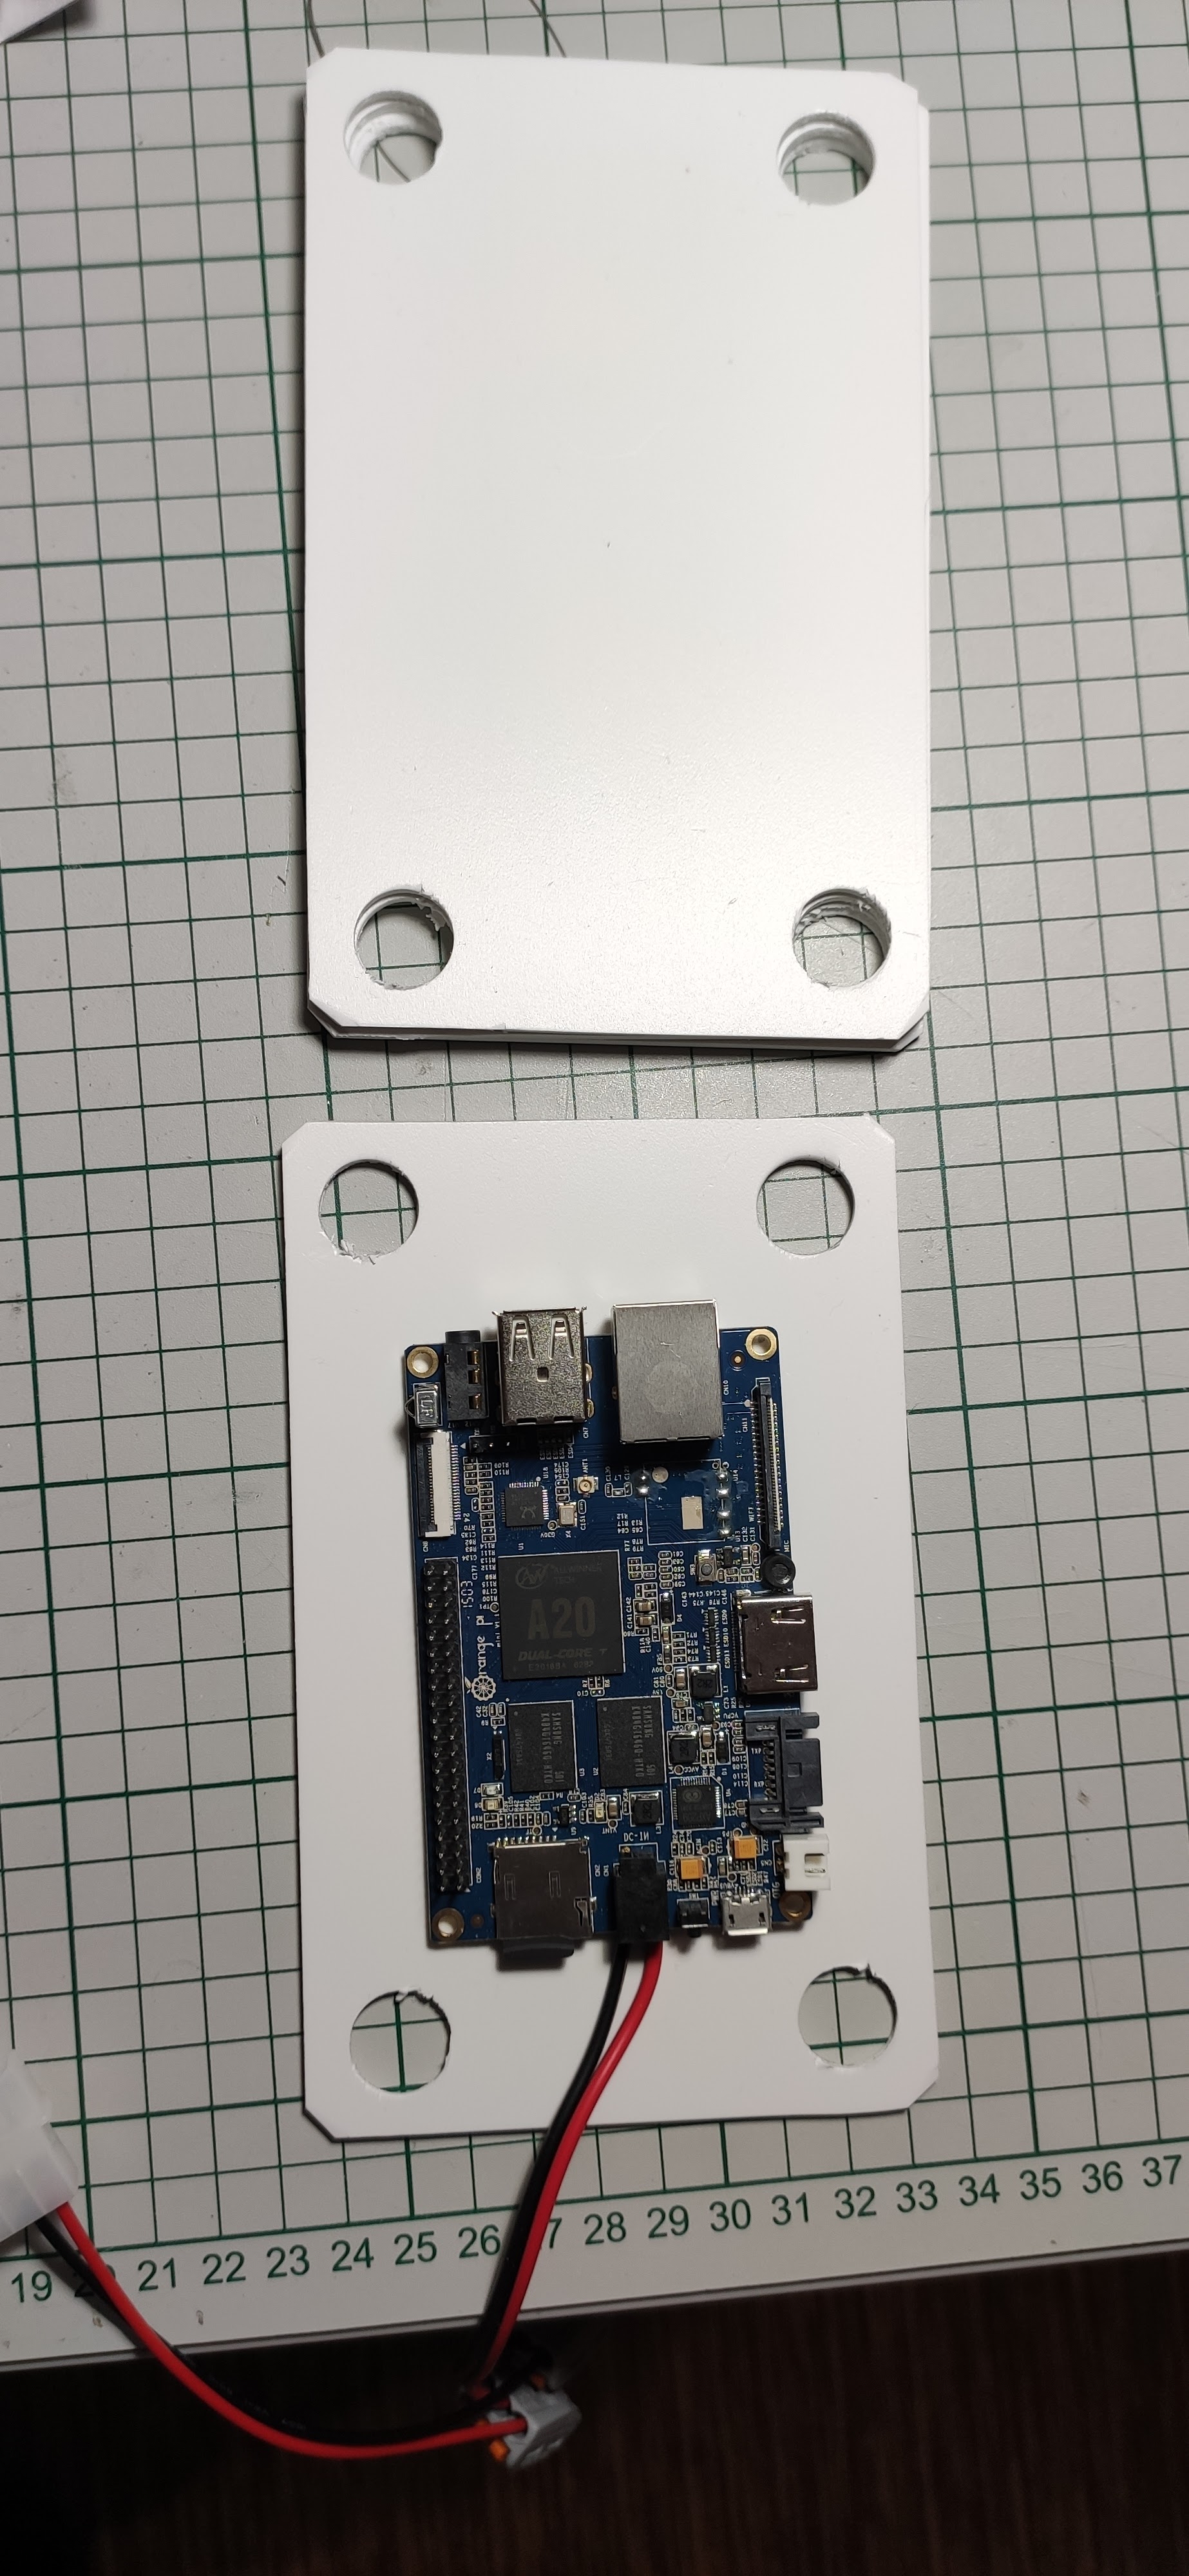
Made some bigger holes on each corner in order to push the pillars as you’ll see in a moment.
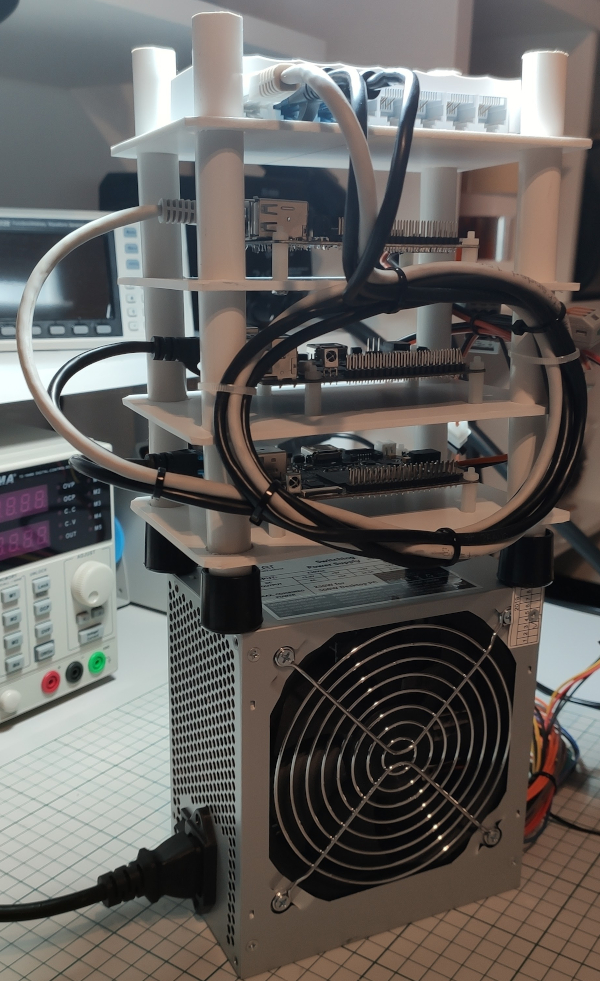
The four pillars of constitution
Had some white plastic tube laying around so I sliced it a little bit… Then I went further and pieced together all the floors of the main building.
I will let the images again to speak for themselves:
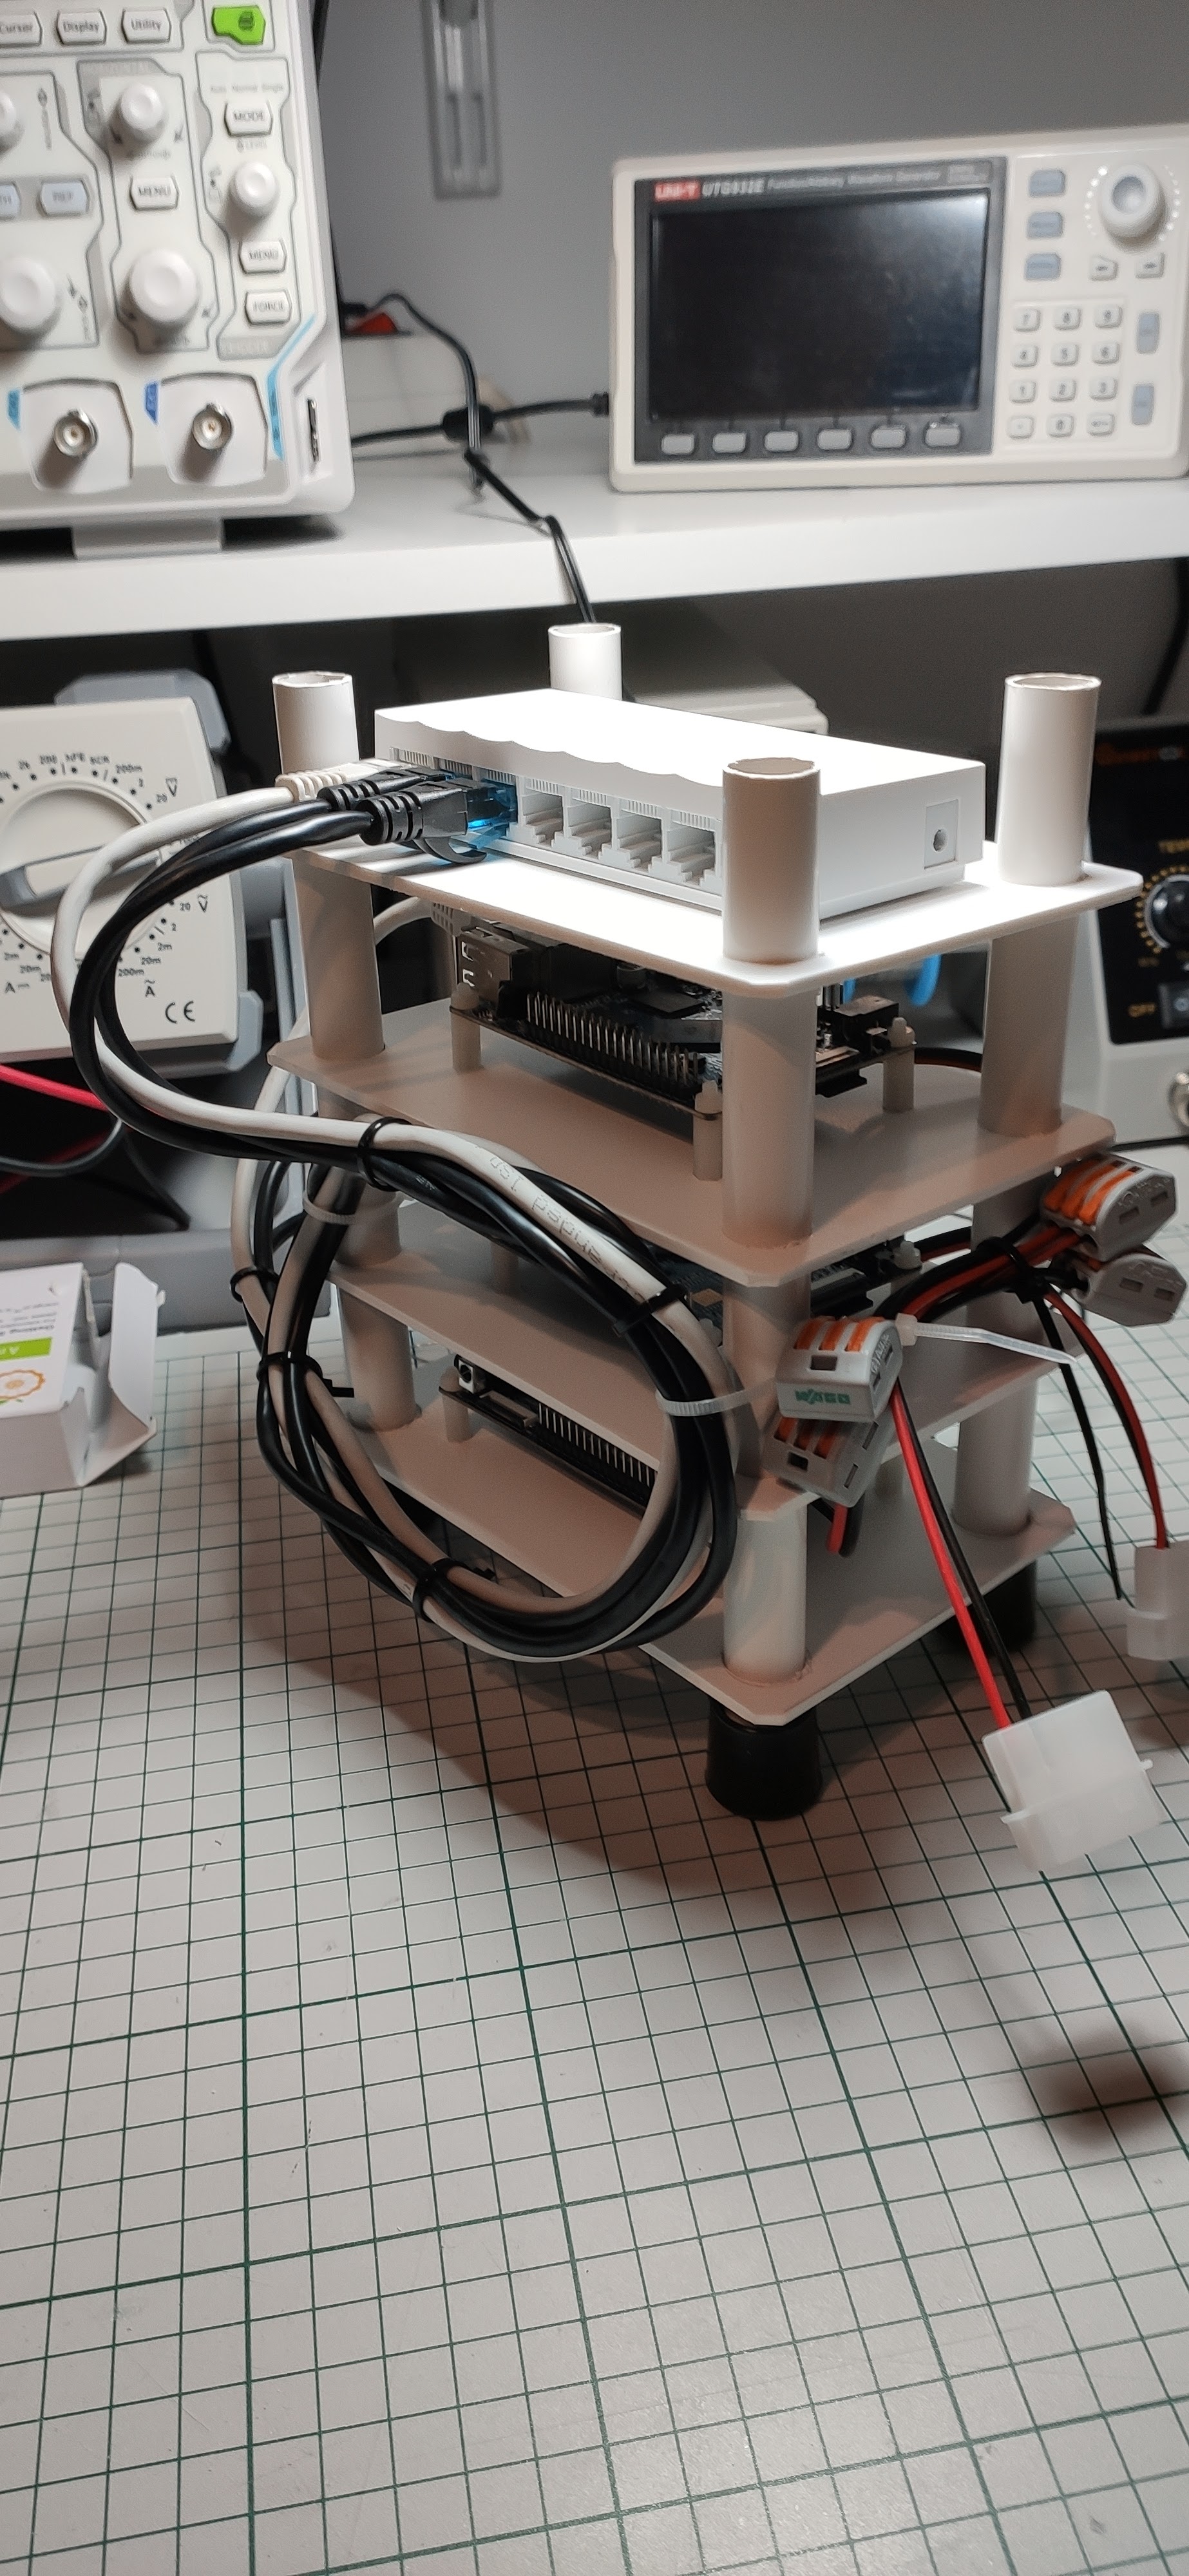
Cable management? Yes, please ! Well not that much cables to manage but still why not tie everything up so that we can avoid a “hairy” situation.
Networking
Not much to say only that at the top of the building is the almighty network switch as you can see in the above picture . It’s a cheap TP-Link 8 port switch which works quite well for this project I would say.
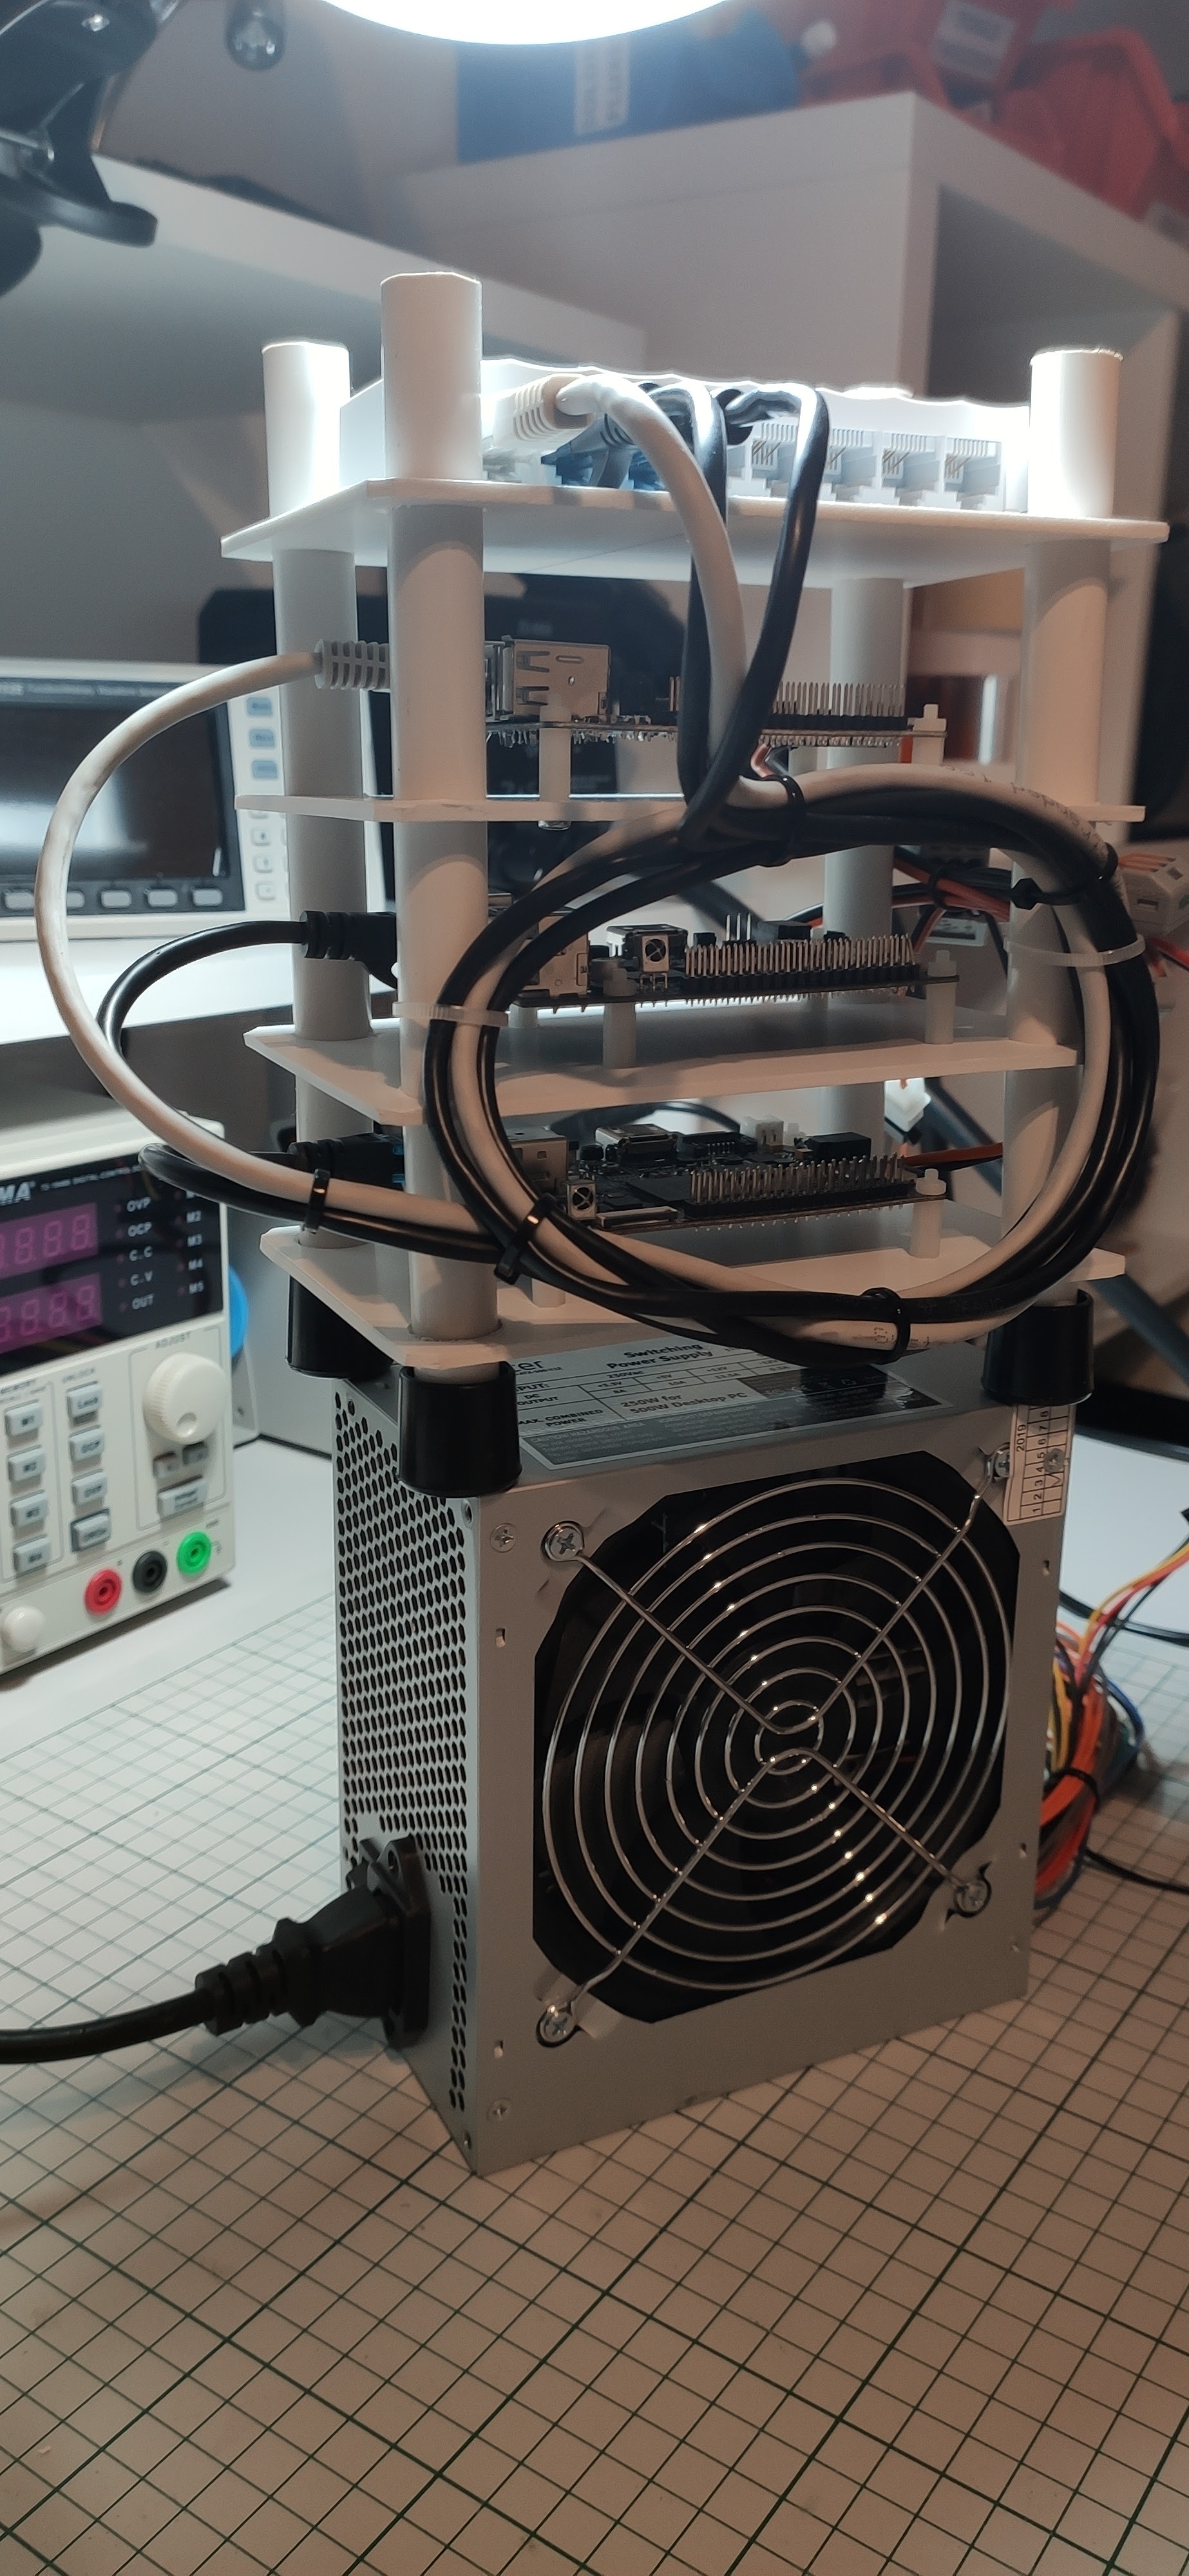
Powering the project
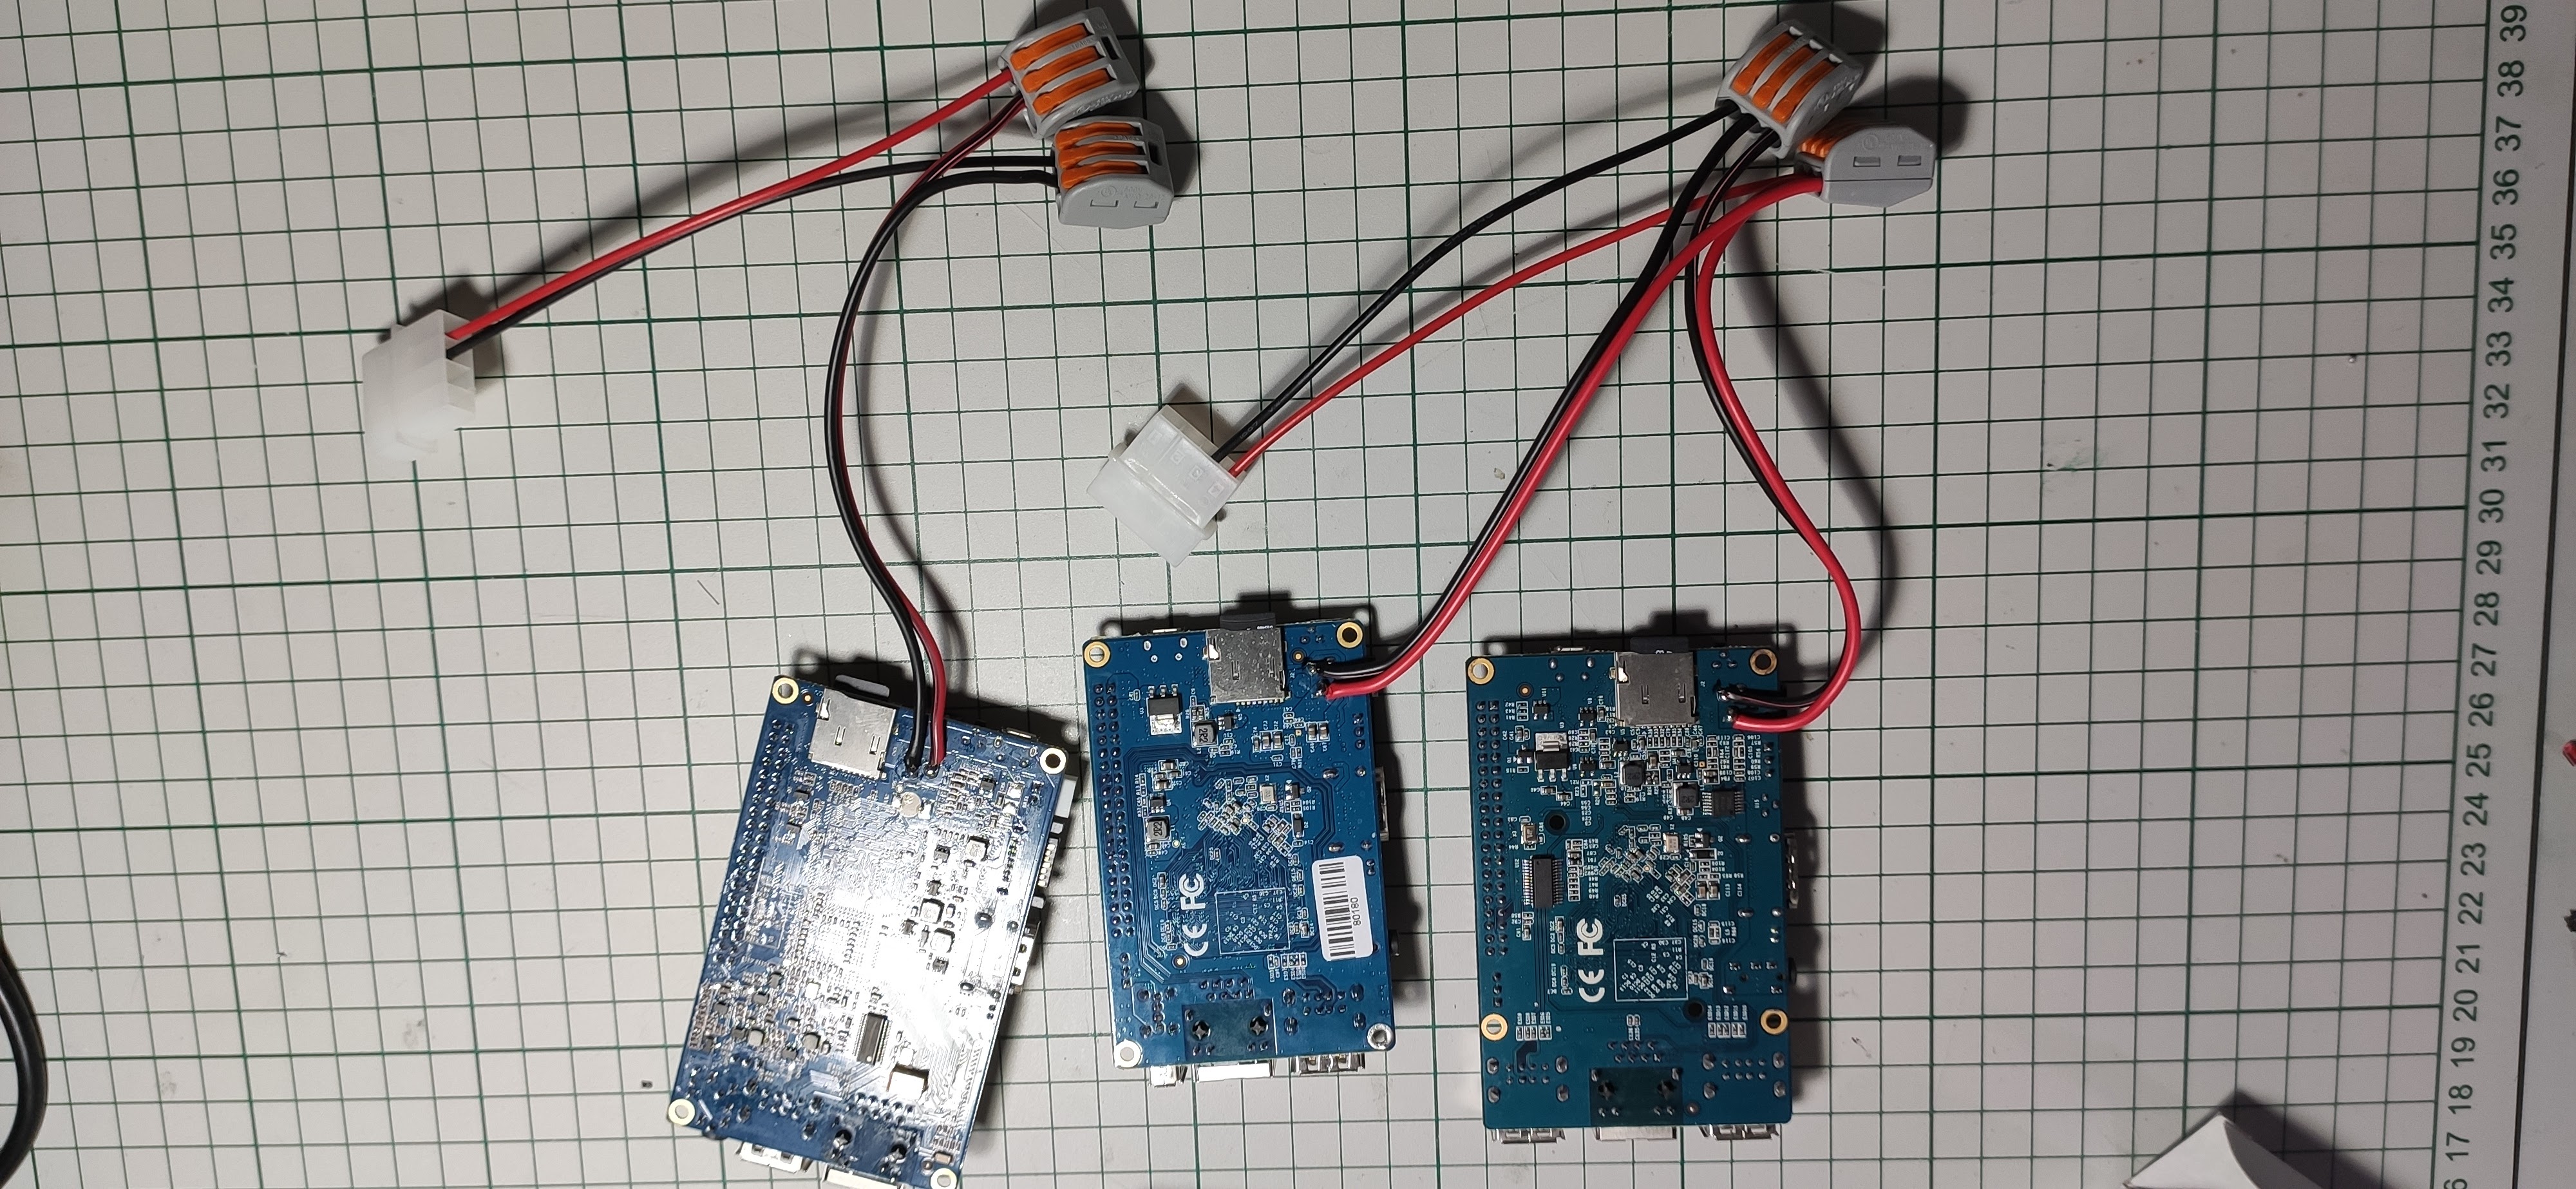
Easily achieved via a PC power supply using only the 5V rail. One board requires around 10-15W of power if I remember well so we need a power supply able to provide 3 x 15W = 45W which should be fine (I took the worst case scenario into consideration). The PC power supply that I’m using is able to provide that level of power and even more for future upgrades so we’re all good on this part. I will do some power consumption measurements at some point in time as well to see exactly the numbers but for now let’s go with some empirical thinking. I used two MOLEX connectors in this build so that we can better distribute the power via the cables. Here I’m talking more about balancing the current via two paths rather than one – more copper the better right? And for simplicity and ease of disassembly later on if required I think that some WAGO connectors really come in handy.
Conclusion
Overall I am pretty happy with the hardware build. We have now a small “tower” of compute units ready to go but who knows maybe it will reach the clouds one day and turn into cloud computing right ?
To be continued …
